All posts by christian

Overview of the Admin Messages Module.

The Admin Messages module is primarily used for TourneyCentral to notify the Tournament Director of invoicing and system messages.

Admin Messages Module

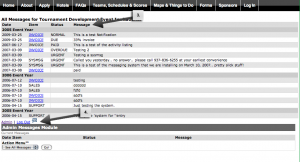
The first thing I will point out is where the messages will appear in the module, this is denoted with the box labeled 1. Here the message will be listed in chronological order, newest first. In order to see all of the messages throughout the years click on the drop down menu, Box 2. Select “See All Messages” and click the “Go!” button.

Admin Message Module

This will bring you to a screen like the one below. You will notice that all of the messages are sorted by year chronologically. Box 3 denotes the header columns; Date, ItemStatus, and Message. Box 4 denotes the Admin link. This link is standard for all of the Admin modules as a way to go back to the admin screen.

Admin Messages Module - See all Messages

The last operation in the Admin Messages Module is the ability to see the Software License. These are the terms and agreements to which the event accepts for using this software. The first thing to do is to click on the Action Menu. The drop down box will appear with the option “Software License”, denoted by Box 5. Select that option and then click the “Go!” button to the right. This will bring you to a screen showing all of the terms and agreements.

Admin Message Module - Software License

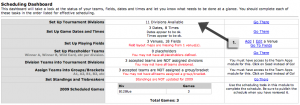
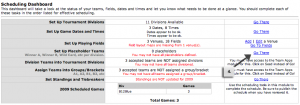
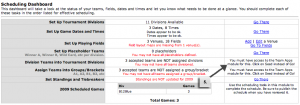
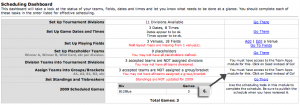
Scheduling Dashboard

1. Start by setting up divisions by clicking on the underlined “Go There” link. For a detailed explaination on how to setup divisions click here

Set-up Divisions

2. When divisions are set up, then scroll to the bottom of the page and in the ‘Action Menu’ select ‘Scheduling Dashboard’

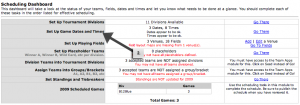
3. Next, set up game dates and times by clicking on the underlined ‘Go There’ link

Game Dates and Times

4. For a more detailed description of filling out the game dates and times click here. After you have completed filling out the game dates and times, continue to the bottom of the page and use the ‘Action Menu’ to navigate back to the Scheduling Dashboard.

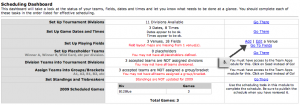
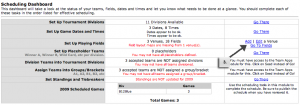
5. Set up Venues by clicking on the ‘Add’ a venue link.
Setup Venues

6. For a more detailed article about setting up the venues click here. Again, return to the Scheduling Dashboard by scrolling to the bottom of the page and select Scheduling Dashboard from the ‘Action Menu’.

7. After the venues are set up, set up the fields.

Setting up the fields

For a more detailed instruction on setting up fields click here.

8. Next set up the the placeholder teams by clicking on the ‘Go There’ link. For more detailed instructions on setting up placeholder teams click here.

Setting up placeholders

9. The next step is to division the teams into their tournament divisions that you setup in step 1. For more detailed instructions on placing the teams into their tournament divisions click here.

Division Teams

10. Set up standings and tiebreakers by clicking on the ‘Go There’ link. For more detailed instructions on setting up standings and tiebreakersclick here.

Set up Standings and Tiebreakers

SCHEDULING MENU
00: Overview
01: Set up tournament divisions
02: Set game times and dates
03: Set up venues and playing fields
04: Create Placeholder Teams
05: Placing Teams into Tournament Divisions/Groups
06: Update and/or review your tie-breaker rules.
07: Schedule games by division
08: Review and publish
09: Making Changes to a Schedule

Mark teams accepted/not accepted

1. In the Team Applications Module, select filter criteria, if known (Ex: Boys 10).

2. Click on the Go! button.

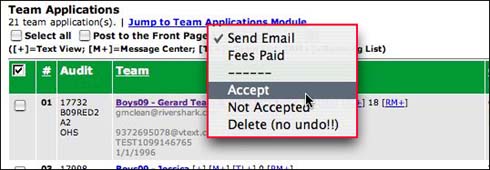
3. Select the “Accept” or “Not Accepted” from the drop down menu at the top of the listing (you can only apply one or the other to a group of records at a time)

4. Check the checkboxes next to the team(s) you wish to mark Accept or Not Accepted

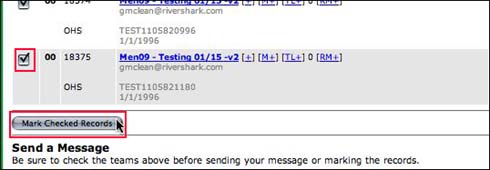
5. Click the Mark Checked Records button at the end of the listing.

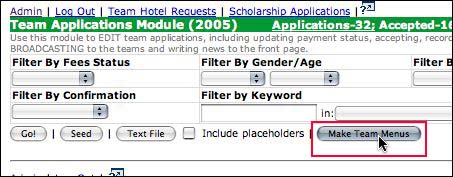
6. In the Team Applications Module, click on the “Make Team Menus” button to build the search menus in the side rail. You should also click on the button every time you make a change in the accpeted/not accepted status of any team, just to make sure you include all.

Before marking teams, you should have a Accept and Not Accept email prepared. Immediately after making the team menus, you should send out an email to the Accepted Teams (filter on acceptance status and make sure that all your teams are selected properly!)

The astute team will notice their status when they log in, even before you send the email, so all of this should be done as one task.

See examples of Acceptance and Non Acceptance letters in the General Help at the top of the Help menu list.

Setting up and Applying Your Email Distribution List

In the update, email distribution will be changing. Currently the email distribution lists are being handled through our servers and when the list needs changing TourneyCentral has to manually change things on the back end. The new version of the software will allow the SuperUser the ability to maintain the email distribution list from the admin on their event, because we understand how the tournament business is very fluid and constantly changing. The other big change is the number of people who will receive emails from the tournament site. We have setup the email distribution to include a persistent email (which gets every email from the site), and a single email address associated with each specific part of the site, e.g. one email will receive only things coming from applications@YOUREVENT.com. In the following help document I will explain how to setup the distribution list in the admin section and also how to setup a gmail account to allow you to automatically forward the emails to any number of people.
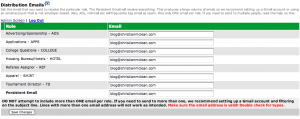
Email Distribution Edit Screen

The image to the left is what you will see when setting up the distribution list. You will see that each specific “department” has one email associated with it, and then there is the persistent email. The difference between the “department” specific emails and the persistent email is the persistent email’s function is to act as a giant bin where al the emails get recored. It is somewhat of an archival tool in which if someone looses something it can be searched for and found in the persistent email account. For the persistent email we STRONGLY suggest you setup a gmail account whose only function is to receive the emails generated from the tournament site. The “department” emails are there only to send out the “department” specific emails to the person who needs that notification.

NOTE: It is not advised to have the persistent email address in any other field, as that will generate duplicate emails.

Now that I have explained what everything is I will go through step by step of how to get to/setup email distribution and gmail filters. First we will go to the admin section of your tournament site, where we will go to the Web Site Maintenance Module>>Set Distribution Emails. Click Go.
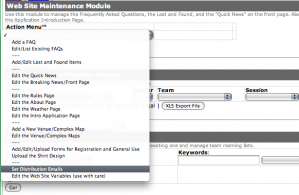
Set Distribution Emails

This will bring us to the next screen shown below. This is where you will edit the email address of whom should receive what emails. In the text fields just enter the email address of where it needs to go. Make sure that there are no typos in the email addresses.
Email Distribution Edit Screen

The next part of this document will show you how to setup distribution to multiple people, if need be, through the use of Gmail filtering. The first thing to do is sign in to you Gmail account and locate and click on the settings link in the upper right hand corner of you browser. This will bring you to the screen below.
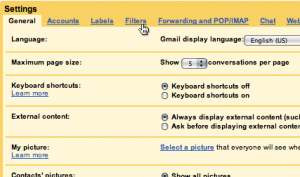
Gmail Settings

From this screen locate and click on the filters tab. (it is where the mouse is pointing). This brings us to the next screen shown below.
Making a filter Step 1

The next step is to click on the Create a new filter link, which will then bring us the the next screen where we will apply the search criteria.
Subject FIlter
Ok, now down to setting up the filter criteria. If there is an email for any specific compartment in the subject will have that compartments handle (e.g. For applications the word APPLICATION will be in the title, for Tournament Director TD will be in the title). The specific handles are | APPS for applications, | TD for tournament director, | ADS for advertising/sponsorship, | COLLEGE for college questions, | HOTEL for housing, | REF for referee, and | SHIRT for apparel. Notice the use of the | (pipe) character, this is one way to distinguish the the format of the contact emails from you event. I would also add in the filter in the space where it say From, the address do_not_reply@YOUREVENTDOMAINNAME.com just to be sure of what you are forwarding. You can test the filter by submitting a test question on you event in the contact us section and then hit the test filter button.

Next we will apply the filter, to do that just click the next step button. The next screen we will see is where we will select the forwarding address for the emails that have been filtered.
Forwarding email

Check the forwarding option among the other actions, and enter in the person’s email that you wish to forward the email to. Click the create filter button to apply the filter. Now you have successfully setup a forwarding filter.

If you have any other questions about this process please feel free to send an email to helpdesk@tourneycentral.com.

***NOTICE Gmail is not our software, therefore we can not support it, nor give a guarantee***
Mark an application paid

1. In the Team Applications Module, select filter criteria, if known (Ex: Boys 10).

2. Click on the Go! button.

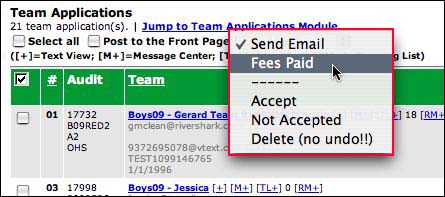
3. Select the “Mark Paid” from the drop down menu at the top of the listing

4. Check the checkboxes next to the team(s) you wish to mark paid

5. Click the Mark Checked Records button at the end of the listing.

You may also mark an application paid in the application detail screen.

The Admin Screen – A Start

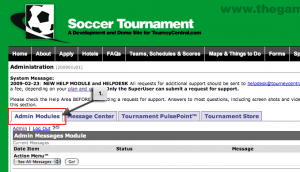
Admin Modules Tab
This is the first screen you will see when you login to the TourneyCentral admin.

The first tab, which is labeled 1 and highlighted by the red box, contains all of the admin modules. This is where most of the administrative work will take place for the event.

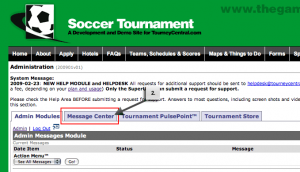
Message Center Tab
The second tab is the Message Center, again highlighted by the red box and labeled 2. In here all of the emails that go/come through the site are captured and sorted according to whom they were sent (Tournament Director, Referee Assignor, Advertising Director, etc…).

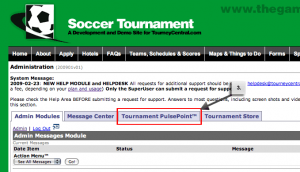
Tournament PulsePoint Tab

The Tournament PulsePoint tab, box 3, is where you are able to see the economic and demographic information in real time for your event. These are good things to know when seeking out advertising opportunities.

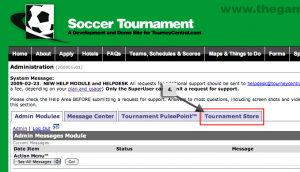
Tournament Store Tab

The Tournament Store Tab is currently in progress.. We will let you know when we decide the outcome of the development.

Seed teams

1. In the Team Applications Module, select an Age Group and Gender to filter (Ex: Boys 10).

2. Click on the Seed button.

3. Select the first seed, select 01 in the drop down menu and click Edit on the team line.

4. Continue until all your teams are seeded. They will sort by seed. Teams are seeded as 00 when the application comes in, so the new teams are always at the top of the list.

Note: Seeding teams as the applications are received will save time and stress!

Adding and Removing Access to the Admin Section

To edit the user access to the administration part of your event software, sign in to the admin screen through http://(your url here).com/admin.

Then scroll to the bottom until you see the Administration Module. There there are fields labeled Name, Pwd, fields for all of the modules with check boxes underneath them, an edit button, and lastly a delete button.

Explanation for the Administration Module

The first two text fields are for the name and password for the user you would like to set up.

The fields for the check boxes are for the privileges you wish to grant that specific user.

The edit button is there for when you want to add the user or when you have modified a current user. This button should be clicked to save the edits you have made to the user list.

The delete button is there, so that you can control access to your administration side of your event.

With the coming software update in January 2010 you will only be able to give access to a maximum of five people.

**Please Note only the SuperUser has the ability to see/edit this module, If you need your password reset or access to the administration side of the event please contact them. The SuperUser is you tournament director.**

Front page photos

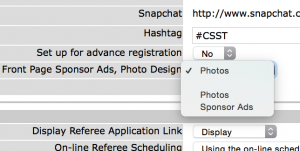
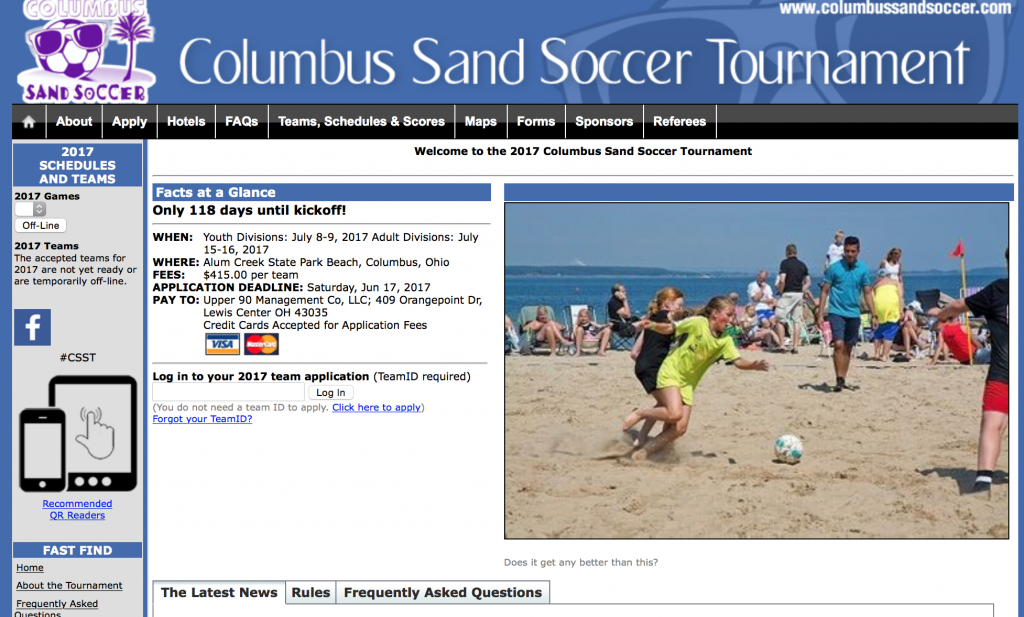
You have a choice to display photos or sponsor logos and links on the far right box of your front page. If you do not have photos uploaded into your Media Management Module, the choice to display photos will not be available.

If you wish to display a static shirt design graphic, select “Display Graphic” and this will override both Photos and Sponsor Ads for your front page. To see which graphic is installed, roll over the “Display Graphic” and the design uploaded will pop over.

To change the shirt design, select Upload Shirt Design from the Action Menu in the Website Maint Module.
The toggle to display photos, sponsor ads or the shirt design in in the Website Maint Module>Variables>GO!

Uploading Photos
If you wish to display photos on your front page, you should upload them BEFORE you attempt to toggle the choice.

1. Select ‘Front Page Photos’ from the drop down menu in the Media Management Module.

2. Click on ‘Go’.

3. Click on ‘Choose File’. *note that only .jpg files smaller than 300k will upload.

4. Add a caption in the ‘caption’ box.

5. Click ‘upload’

NOTE: You have the option to display larger photos, but you will lose the center NEWS headlines. A sample of the front page is below. If you wish to display larger photos, please contact TourneyCentral through your Help Module and we will toggle your GLOBAL VARIABLES.

Embedding:
You may also wish to consider embedding content from your social media feeds and leave the sponsor logo rotation in the media box on your front page. Embedding content from your social platforms gives you the flexibility to include richer graphics on your front page AND keep your sponsors on the front page.

Give someone access to the modules

1. In the Administration Users module, enter a name in the Name text box under the Name column and a password in the Password text box under the Pwd column.

2. Place a checkmark in each of the module check boxes that the user will be granted access.

3. Click the Add button in the Action column.


Change my password

1. In the Administration Users module, make change the password in the Pwd column next to the appropriate user.

2. Click the Edit button in the Action column.

As the SuperUser, you may not delete yourself. To transfer SuperUser administration to someone else, call Rivershark, Inc. There may be only one SuperUser per tournament event.

Schedule referees

1. Select ‘Assign Referees’ from the action menu in the reffree Module.

2. Select the Day, and Field or Venue.

3. Click on ‘Go’.

4. Select the referees from the drop downs.

5. Click on ‘update referees schedule’.

Delete a referee

1. In the Referee Module, select Build a Referee Listing from the Action drop down menu.

2. Select filter criteria if known.

3. Click on the application name to be modified from the Referee column.

4. Click on the Go! button.

5. Make necessary changes to the application information.

6. Click the Modify Application button.

Accept a referee

1. In the Referee Module, select Build a Referee Listing from the Action drop down menu.

2. Select filter criteria if known.

3. Click on the Go! button.

4. Click on the link to the referee to be accepted in the Referee column.

5. Place a checkmark in the Active check box.

6. Click on the Modify Application button.

Modify a referee application

1. In the Referee Module, select Build a Referee Listing from the Action drop down menu.

2. Select filter criteria if known.

3. Click on the application name to be modified from the Referee column.

4. Click on the Go! button.

5. Make necessary changes to the application information.

6. Click the Modify Application button.


Send a message to current referees

1. In the Referee Module, select Build a Referee Listing from the Action drop down menu.

2. Select filter criteria if known.

3. Click on the Go! button.

4. Place a checkmark in the Select All check box.

5. Select the return email address from the Return Email drop down menu that is to appear in the message.

6. Enter a subject in the Subject text box.

7. Enter the message in the Message text box.

8. Click the Send Message button.

Send a marketing message to last years referees

1. In the Referee Module, select Build a Referee Listing from the Action drop down menu.

2. Select filter criteria if known.

3. Place a checkmark in the check box next to the referee’s name or the ‘Select All’ box.

4. Select the return email address from the Return Email drop down menu that is to appear in the message.

5. Enter a subject in the Subject text box.

6. Enter the message in the Message text box.

7. Click the Send Email Message button.

Print schedules for my program/posting

To print, make sure your “Print Backgrounds” is turned on if you want the shading to appear.

Ctrl-P to print. Print to PDF if you want to place them in a program layout file.


Note: Video has no sound.

In the Scheduling Module:
– Select the Division
– Check the data parts you want to appear
– Click on PROGRAM LAYOUT (not Go!)
– Select Print
– On a Mac, print to the PDF in the video. On Windows, select the Acrobat print driver
– Name your PDF file as the division
– Click Back
– Repeat for each division

Many page layout programs do not deal well with multiple-page PDF files. But IF they do or if you can split the pages, click here for the quick tutorial on making a multi-page file.

This is a quick tool to split PDF pages into single pages.

Export a schedule

1. Select the Division from the filter by division drop down, or select the all box.

2. Select the if you want the game no., division, teams, clubs, and refs. to be shown on the schedule.

3. Click on XLS Export File.

4. Click on the ‘here’ link at the top of the page.

5. Complete the download.

Find game conflicts

1. Select ‘Schedule grid’ from the action menu in the scheduling module.

2. Select a day in the By day drop down.

3. Click on ‘Go’.

4. The blocks that show up red are conflict games.

5. Click on the box and edit or delete the game.

Adding Venues and maps

1. Select add a new venue/ complex map from the drop down in the the web site maintenance module.

2. Click on ‘go’.

3. Select if it is active and if it is the main venue.

4. Type in the complex code. This is usually a three letter code close to the park name. Max. eight characters.

5. Enter the Latitude and Longitude if known.

6. Enter the address. A link to Yahoo! maps will be built.

7. Enter driving directions and park info.

8. Click on ‘Add Map’

How do I upload forms for registration and general use

1. Select ‘Add/Edit/Upload forms for registration and general use’ from the action menu in the Web site maintenance module.

2. Click on ‘Go’

3. Enter the form name

4. Select the Type of file

5. Select its code(ad sale, t-shirt, sanction, etc)

6. Click on ‘add’

If the file is a PDF (if html, skip to the bottom)
7. To upload the file click on the UP blue arrow on the left
Screen Shot 2015-07-31 at 9.05.58 AM

8. Click on ‘choose file’ from the new window

9. Select the file.

10. Click on upload. Refresh the screen

11. To review your file and see what is installed, click on the the DOWN blue arrow. The icon will either bring you to the HTML page or download the PDF that is installed for that form.

If the “form” points to an html page
7. Enter the link in the field. Click Edit

Attaching PDFs to outgoing emails

You technically don’t attach PDFs to outgoing emails. You upload the PDF to the FORMS center and then provide a link to the PDF. This accomplishes a few things:
– Keeps your emails from ending up in more spam filters
– Keeps the emails small and speedy, especially on mobile devices
– Keeps your PDF available for the teams to be able to download again if they lose or delete the email.
– The PDF will also be available in the list of documents your teams will need for registration.

1. Upload your PDF using the directions above

2. Copy the file name and put your tournament URL in front of it like so.
http://www.yourtournament.com/pdf/TEST463.pdf

pdfforms

3. Paste this into a web browser to MAKE SURE it is correct and your PDF displays properly BEFORE SENDING.

4. Past this where you need to in your email.

5. Send the email.

If the PDF is also part of an advertisers package and they have a DEALS ad, you should also upload it as a flyer to display in the listing.

How do I set the fees

1. Select ‘Edit the web site variables’ from the action menu in the web site maintenance module.

2. Click on ‘Go’.

3. Enter the 1st amount in the Fees 1 text box.

4. Select the age groups which that fee amount applies to.

5. Enter a second fee amount if needed.

6. Click on ‘save changes’ at the bottom of the page.

Edit About Page

1. Select ‘Edit the About Page’ from the drop down in the Web Site Maintenance Module.

2. Click on ‘Go’

3. Add or edit any typing in the box text box.

Be brief and specific with details. Don’t copy others. Be unique!

4. Click on ‘Save the About Page Edits’

Adding Venues and maps

1. Select add a new venue/ complex map from the drop down in the the web site maintenance module.

2. Click on ‘go’.

3. Select if it is active and if it is the main venue.

4. Type in the complex code. This is usually a three letter code close to the park name. Max. eight characters.

5. Enter the Latitude and Longitude if known.

6. Enter the address. A link to Yahoo! maps will be built.

7. Enter driving directions and park info.

8. Click on ‘Add Map’

Change the Fees, Bond amounts

1. In the Web Site Maintenance Module, select Edit the Web Site Variables from the drop down menu.

2. Click the Go! button.

3. Edit the Fees 1, Fees 2 and/or Fees3 fields, entering the fees and selecting the appropriate age group for the fee. You may have up to three fees levels.

4. Enter the bond amount, if appropriate and select the age group for which you would like the bond to apply. If you do not require a bond, leave this 0.00

5. If you need to communicate something special about the payment, enter it in the extra Message field.

6. Click the Save Changes button.

An example of the payment coupon and where the values appear for the guest team is pasted below:

Edit the front page news?

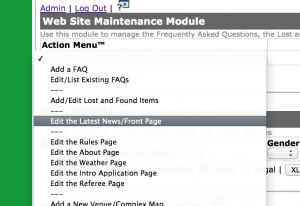
1. In the Web Site Maintenance Module, select Edit the Latest News/Front Page from the Action drop down menu. Click GO!
Screen Shot 2014-04-11 at 9.11.28 PM

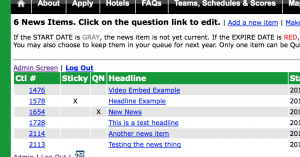
2. Click the “Add a new item” link to the immediate right of the headline.
Screen Shot 2014-04-11 at 9.11.39 PM

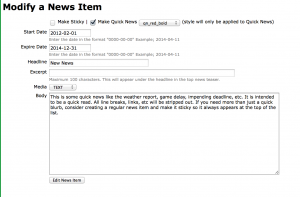
3. Complete the details in the form. Make Sticky will keep the news at the top of the list, regardless of the dates of subsequent news items (within the Start/Expire Dates) Make Quick News will place the news in the middle of the front page, with the style selected from the drop down menu.(again, within the Start/Expire dates) You should only select one sticky and one quick news item.
Screen Shot 2014-04-11 at 9.12.02 PM

4. Click the Add news item button.

To edit an exiting news item, click on the Headline in the listing and modify the details.

Claim a Lost and Found Item

1. In the Web Site Maintenance Module, select Add/Edit Lost and Found Items from the drop down menu.

2. Click the Go! button.

3. Click on the Claimed button in the Action column to the right of the item to be claimed.

4. Click the Claimed button. TournamentTrak will remove the item from the Lost and Found inventory.

Edit a FAQ

1. In the Web Site Maintenance Module, select “Edit/List Existing FAQs” from the drop down menu.

2. Click the “Go!” button.

3. Click on the FAQ to be changed in the “Question” column.

4. Make the necessary changes.

5. Check for typographical errors.

6. Click on the “Edit FAQ” button.

Schedule Year

The schedule year is the year for which you wish to display the schedule and accepted teams. This will be last year’s schedule UNTIL your application deadline for the current year. You are not able to change this setting from the admin screen. Rivershark will change this once your deadline has been reached.

Expand a hotel listing

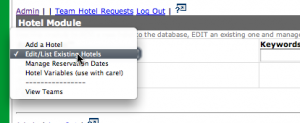
1. In the Hotel Module, select Edit/List Existing Hotels from the “Action” drop down box.

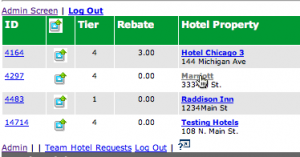
2. Click on highlighted hotel requiring updating.

3. Click the box to the right of “Expand Listing” field.

4. Click “Edit Hotel Property”.

Mark a hotel “Sold Out”

1. In the Hotel Module, select Edit/List Existing Hotels from the “Action” drop down box.

2. Click on highlighted hotel requiring updating.

3. Scroll towards the bottom of the form to the “Status” field.

4. Select “Sold Out” from the “Status” drop down box.

5. Click “Edit Hotel Property”.

Modify the hotel amenities

1. In the Hotel Module, select Edit/List Existing Hotels from the “Action” drop down box.

2. Click on highlighted hotel requiring updating.

3. Modify the hotel’s amenities in the fields as required.

4. Click “Edit Hotel Property” when complete.

Modify a hotel

1. In the Hotel Module, select Edit/List Existing Hotels from the “Action” drop down box.
modifyHotel01

2. Click on highlighted hotel requiring updating.
modifyHotel02

3. Modify the hotel’s information in the fields as required.

4. Click “Edit Hotel Property” when complete.

Add a hotel

1. In the Hotel Module, select Add a Hotel from the “Action” drop down box.

2. Enter the hotel’s information in the fields as shown.

3. Click “Add Hotel Property” when complete.

Getting reports for ads sold

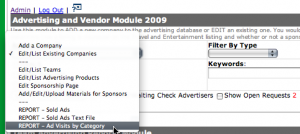
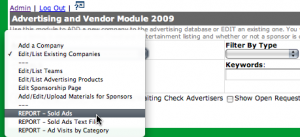
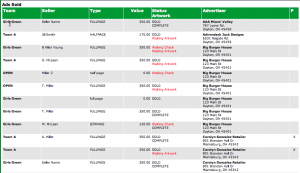
1. Select ‘REPORT- ads sold’ from the drop down in the Advertising and Vendor Module.
adsSold01

2. Click on ‘Go’, and you should see a screen like the one below.
adsSold02

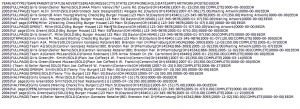
There is another other optional way to look at the ads sold. The first is as a simple text file, for this select ‘REPORT- sold ads as textfile’ from the action menu.
adsSold03

You should se a list of the ads as a text, you can either copy/paste the text or print it off.
adsSold04

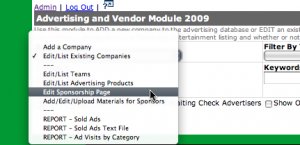
Edit the Sponsorship page

1. Select Edit the sponsorship page from the drop down in the Advertising and Vendor Module.
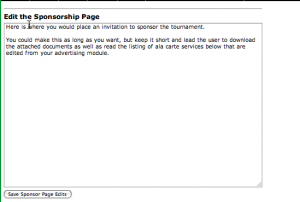
editSpon01
2. Type the corrections in the text box.
editSpon02

3. Click on ‘Save sponsor page Edits’

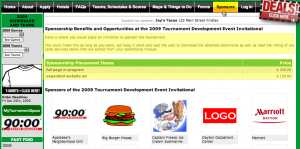
The text you type on this page will be the text the shows up on the page when people click on the Sponsors tab in the navigation bar. Also the active options from advertising product inventory descriptions will show up along with the prices. Highlighted below.
editSpon03

Web Traffic/Advertising Terms

Deals: That listing you get when you click on the Deals button on the upper rigth side of the web site

webTraffic01

Page View: One web page.. i.e., the home page is a page view, a look at the BU12 scores is a page view, etc.

Hits: HUGE number, but almost entirely meaningless. A hit is a download of a file to the browser. The home page might have 12 hits (header graphics, photo, 3 scripts that produce the about data, etc, etc while the scores might only have 5 hits…)

Unique Visitor: You will get asked this a lot. This is what advertisers like, because it is generally a lower number and they want to based their CPM on this number. You want them to based their CPM on page views. It is an attempt to measure how many unique people visit the site, rather than the number of pages. It is unmeasurable for all sorts of reasons I won’t even begin to go into. But, they will ask and we will tell. However, the high number of page views to unique visitor ratio suggests that many people visit again and again and again…. we have stickiness. (An average tournament will get 6,000-9,000 unique visitors)

Stickiness: The ability of a web site to attract a loyal audience, measured through repeat visits.

Expanded Listing: A listing in the Deals section. This is named such because you can elect to just list the business name, address and phone number OR “expand” out their listing to include a logo, maps, and an offer. Each expanded listing will be billed at $10 per on your final invoice, no matter how much you charge the company.

Generate an invoice/statement

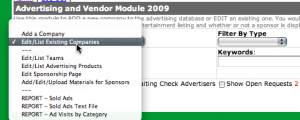
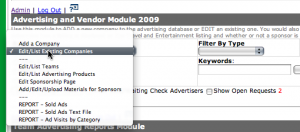
1. In the Advertising/Vendor Module, select Edit/List Existing Companies from the “Action” drop down box.
invoice01

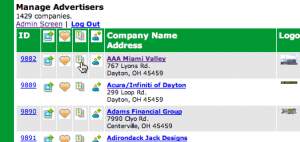
2. Click on the highlighted company name requiring updating.
invoice02

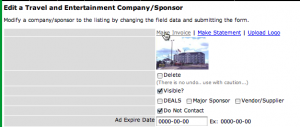
3. Click on the highlighted and underlined “Make Invoice” link.
invoice03

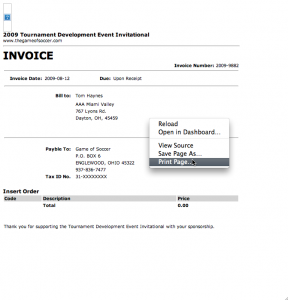
4. Place the mouse cursor inside the invoice and right-click the mouse.

5. Select “Print.”
invoice04

Mark an advertising sale paid

1. In the Advertising/Vendor Module, select Edit/List Existing Companies from the “Action” drop down box.
adPaid01

2. Click on the dollar symbol next to the highlighted company name requiring updating.
adPaid02
3. Select the type of sale from the “Placement” drop down box.
adPaid03
4. Select the status of the artwork from the “Artwork” drop down box.
adPaid04
5. Enter the date (yyyy-mm-dd) the sale was paid in the “Date Paid” box.
adPaid05
6. Select the team in the “Credit Team Sold By” drop down box.
adPaid06
7. Click the Add button.

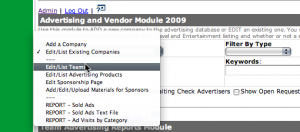
Credit teams for advertising sales

For a new company,

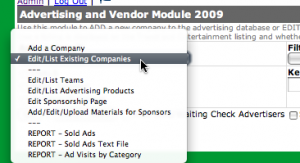
1. In the Advertising/Vendor Module, select Edit/List Existing Companies from the drop down menu.
Credit Teams for Ads

2. Click the Go! button.

3. Click on the dollar sign link next to the company name.
Credit Ad

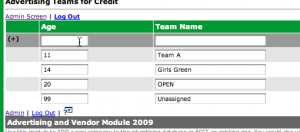
4. Select the team to receive the credit under the Credit Team Sold By column.
Choose Team to Credit

5. Click the Add button.

For an existing sale,

1. In the Advertising/Vendor Module, select Edit/List Existing Companies from the drop down menu.

2. Click the Go! button.

3. Select the team to receive the credit under the Credit Team Sold By column.

4. Click the Update button.

Add a company logo/DEALS

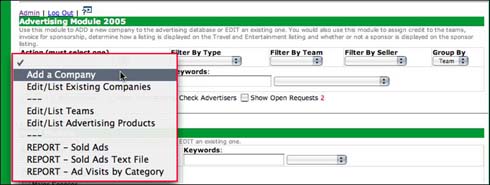
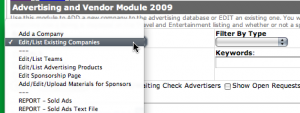
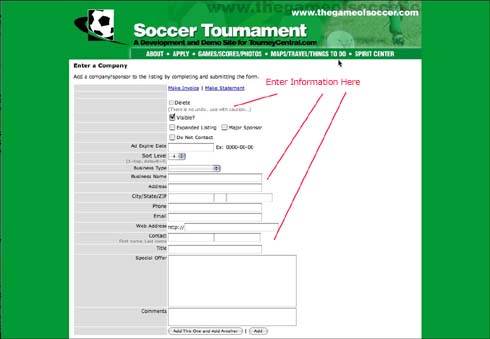
1. In the Advertising Module, select Add A Company from the drop down menu.

2. Click the Go! button.

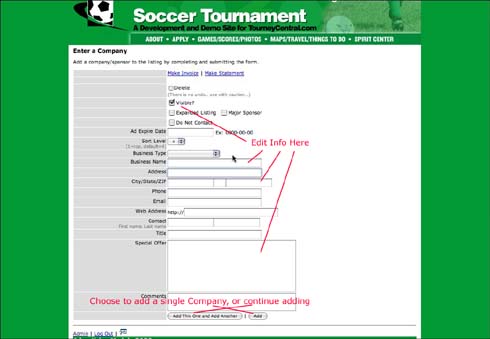
3. Enter the company information in the fields as shown.

4. Click on the check box next to DEALS to add a checkmark.

5. Click the Add button to add the company to the database OR if you have more companies to enter, click the Add This One And Add Another button. TournamentTrak will then present a blank form to add the next company.

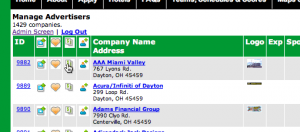
To add a company logo, first insert the record in the database from above. Go back to the listing of companies and you will see four images on the left hand columns. You want to click on the first icon, as highlighted below.
Add Logo Icon

When you click on the icon an new window will appear asking you to select a file from your computer.

***NOTICE only .jpgs and .gif files will be selected. ALSO do not have any spaces or goofy characters in the images name (e.g a ‘,/”;:()&%$#@!&^\}{][-_+=`~>

Add a major sponsor

1. In the Advertising/Vendor Module, select Add A Company from the drop down menu.

2. Click the Go! button.

3. Enter the company information in the fields as shown.

4. Click on the check box next to Major Sponsor to add a checkmark.

5. Click the Add button to add the company to the database OR if you have more companies to enter, click the Add This One And Add Another button. TournamentTrak will then present a blank form to add the next company.

Modify a company

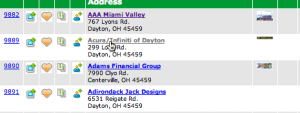
1. In the Advertising/Vendor Module, select Edit/List Existing Companies from the drop down menu.
modifyComp01
2. Click the Go! button.

3. From the list presented, click on the company to be edited. Each company name on the list will appear in bold and be underlined.
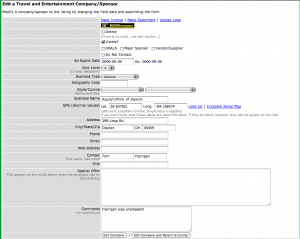
modifyComp02

4. Change the information as needed.
modifyComp03

5. Click the Edit Company button to add the changes to the database OR if you have more changes to make to other companies, click the Edit Company And Return To Listing button. TournamentTrak will again present the list of companies to edit.

Download data for mailing labels

1. In the Team/Club/Association Marketing Module, choose Edit/List Organizations from the Action drop down menu.

2. Select desired filters OR keep the filter drop down menus blank to select all teams.

3. Click on the “Mailing Labels” button.

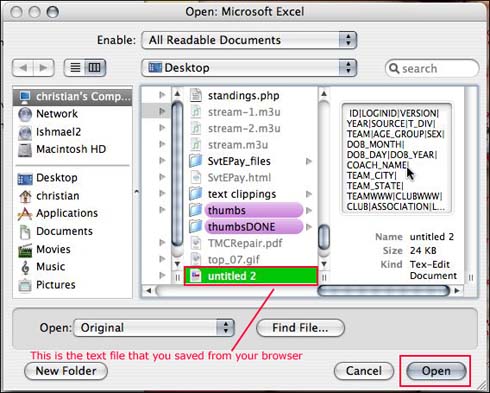
4. From the browser toolbar, click File, then Save As.

5. Select the file type to save Text to your desktop.

6. Open Excel, Access or your favorite database program.

7. Import as a Delimited File.

8. Directions for Excel Only

9. Open Excel.

10. File>Open your text file that you saved in step 3 above.

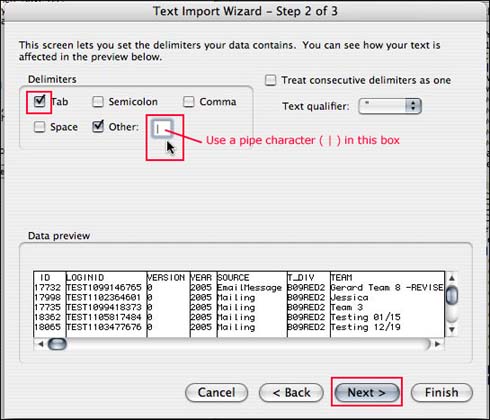
11. Select Delimited; Click on Next.

12. Select other (input the character ^ or |, depending on which works You’ll see the data line up in columns for the character the works).

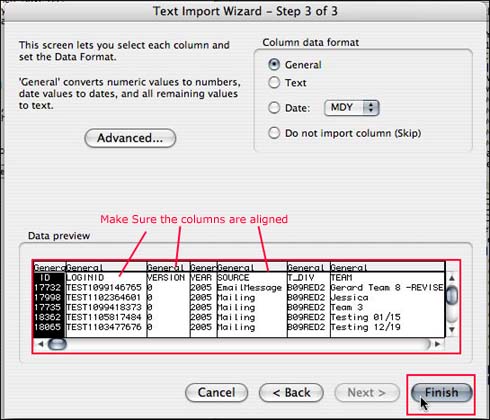
13. Click on Next.

14. Click on Finish.

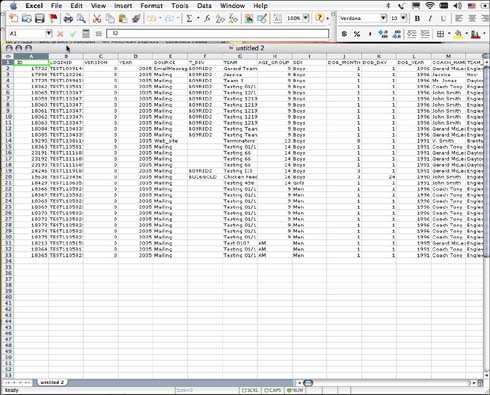
15. Save or use just as any other Excel file.

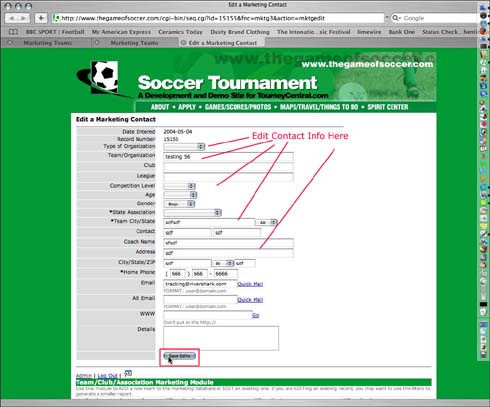
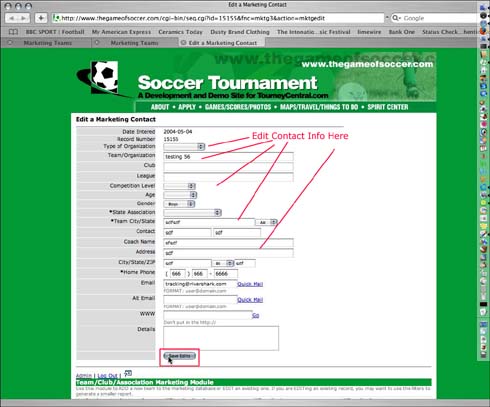
Edit a marketing contact

1. In the Team/Club/Association Marketing Module, select Edit/List Organizations from the Action drop down menu.

2. Click the Go! button.

3. From the list presented, click on the contact to be edited. Each company name on the list will appear in bold and be underlined in the Team/Organizationí column.

4. Change the information as needed.

5. Click the Save Edits button to add the changes to the database.

Download a text file for Excel or other database

1. In the Team Applications Module, select desired filters OR keep the filter drop down menus blank for all teams.

2. Click on the ‘XLS Export File’ button.

3. Right click the ‘here’ link to download the excel file

* Any changes made in this file can not be re-uploaded onto site. Make all changes on website.

– LiteView: This will build just a list of contact information for the teams you selected.

-Include placeholders: This list will include placeholder teams.

View an application

1. In the Team Applications Module, select filter criteria, if known (Ex: Boys 10).

2. Click on the Go! button.

3. Click on the team name in the Team column to view the application.

Note: Clicking on the Go! Button without selecting any filter criteria will result in a list of all applications stored in the database.

Delete an application

1. In the Team Applications Module, select filter criteria, if known (Ex: Boys 10).

2. Click on the Go! button.

3. Select the “Delete (no undo!!) from the drop down menu at the top of the listing

4. Check the checkboxes next to the team(s) you wish to delete

5. Click the Mark Checked Records button at the end of the listing.

Note: Deleting an application IS PERMANENT AND IMMEDIATE. Before deleting an application, make sure this is what needs to be done.

Exporting Team Roster Data

Team Roster Listings

In order to get a listing of the of the team rosters go to the Team Applications Module, and select the Team List (Roster) Data option from the Action Menu, as shown above. If you just want a listing the click on the “Go!” button, but you can also download it as an XLS file if you click in the “XLS Export File” button.